


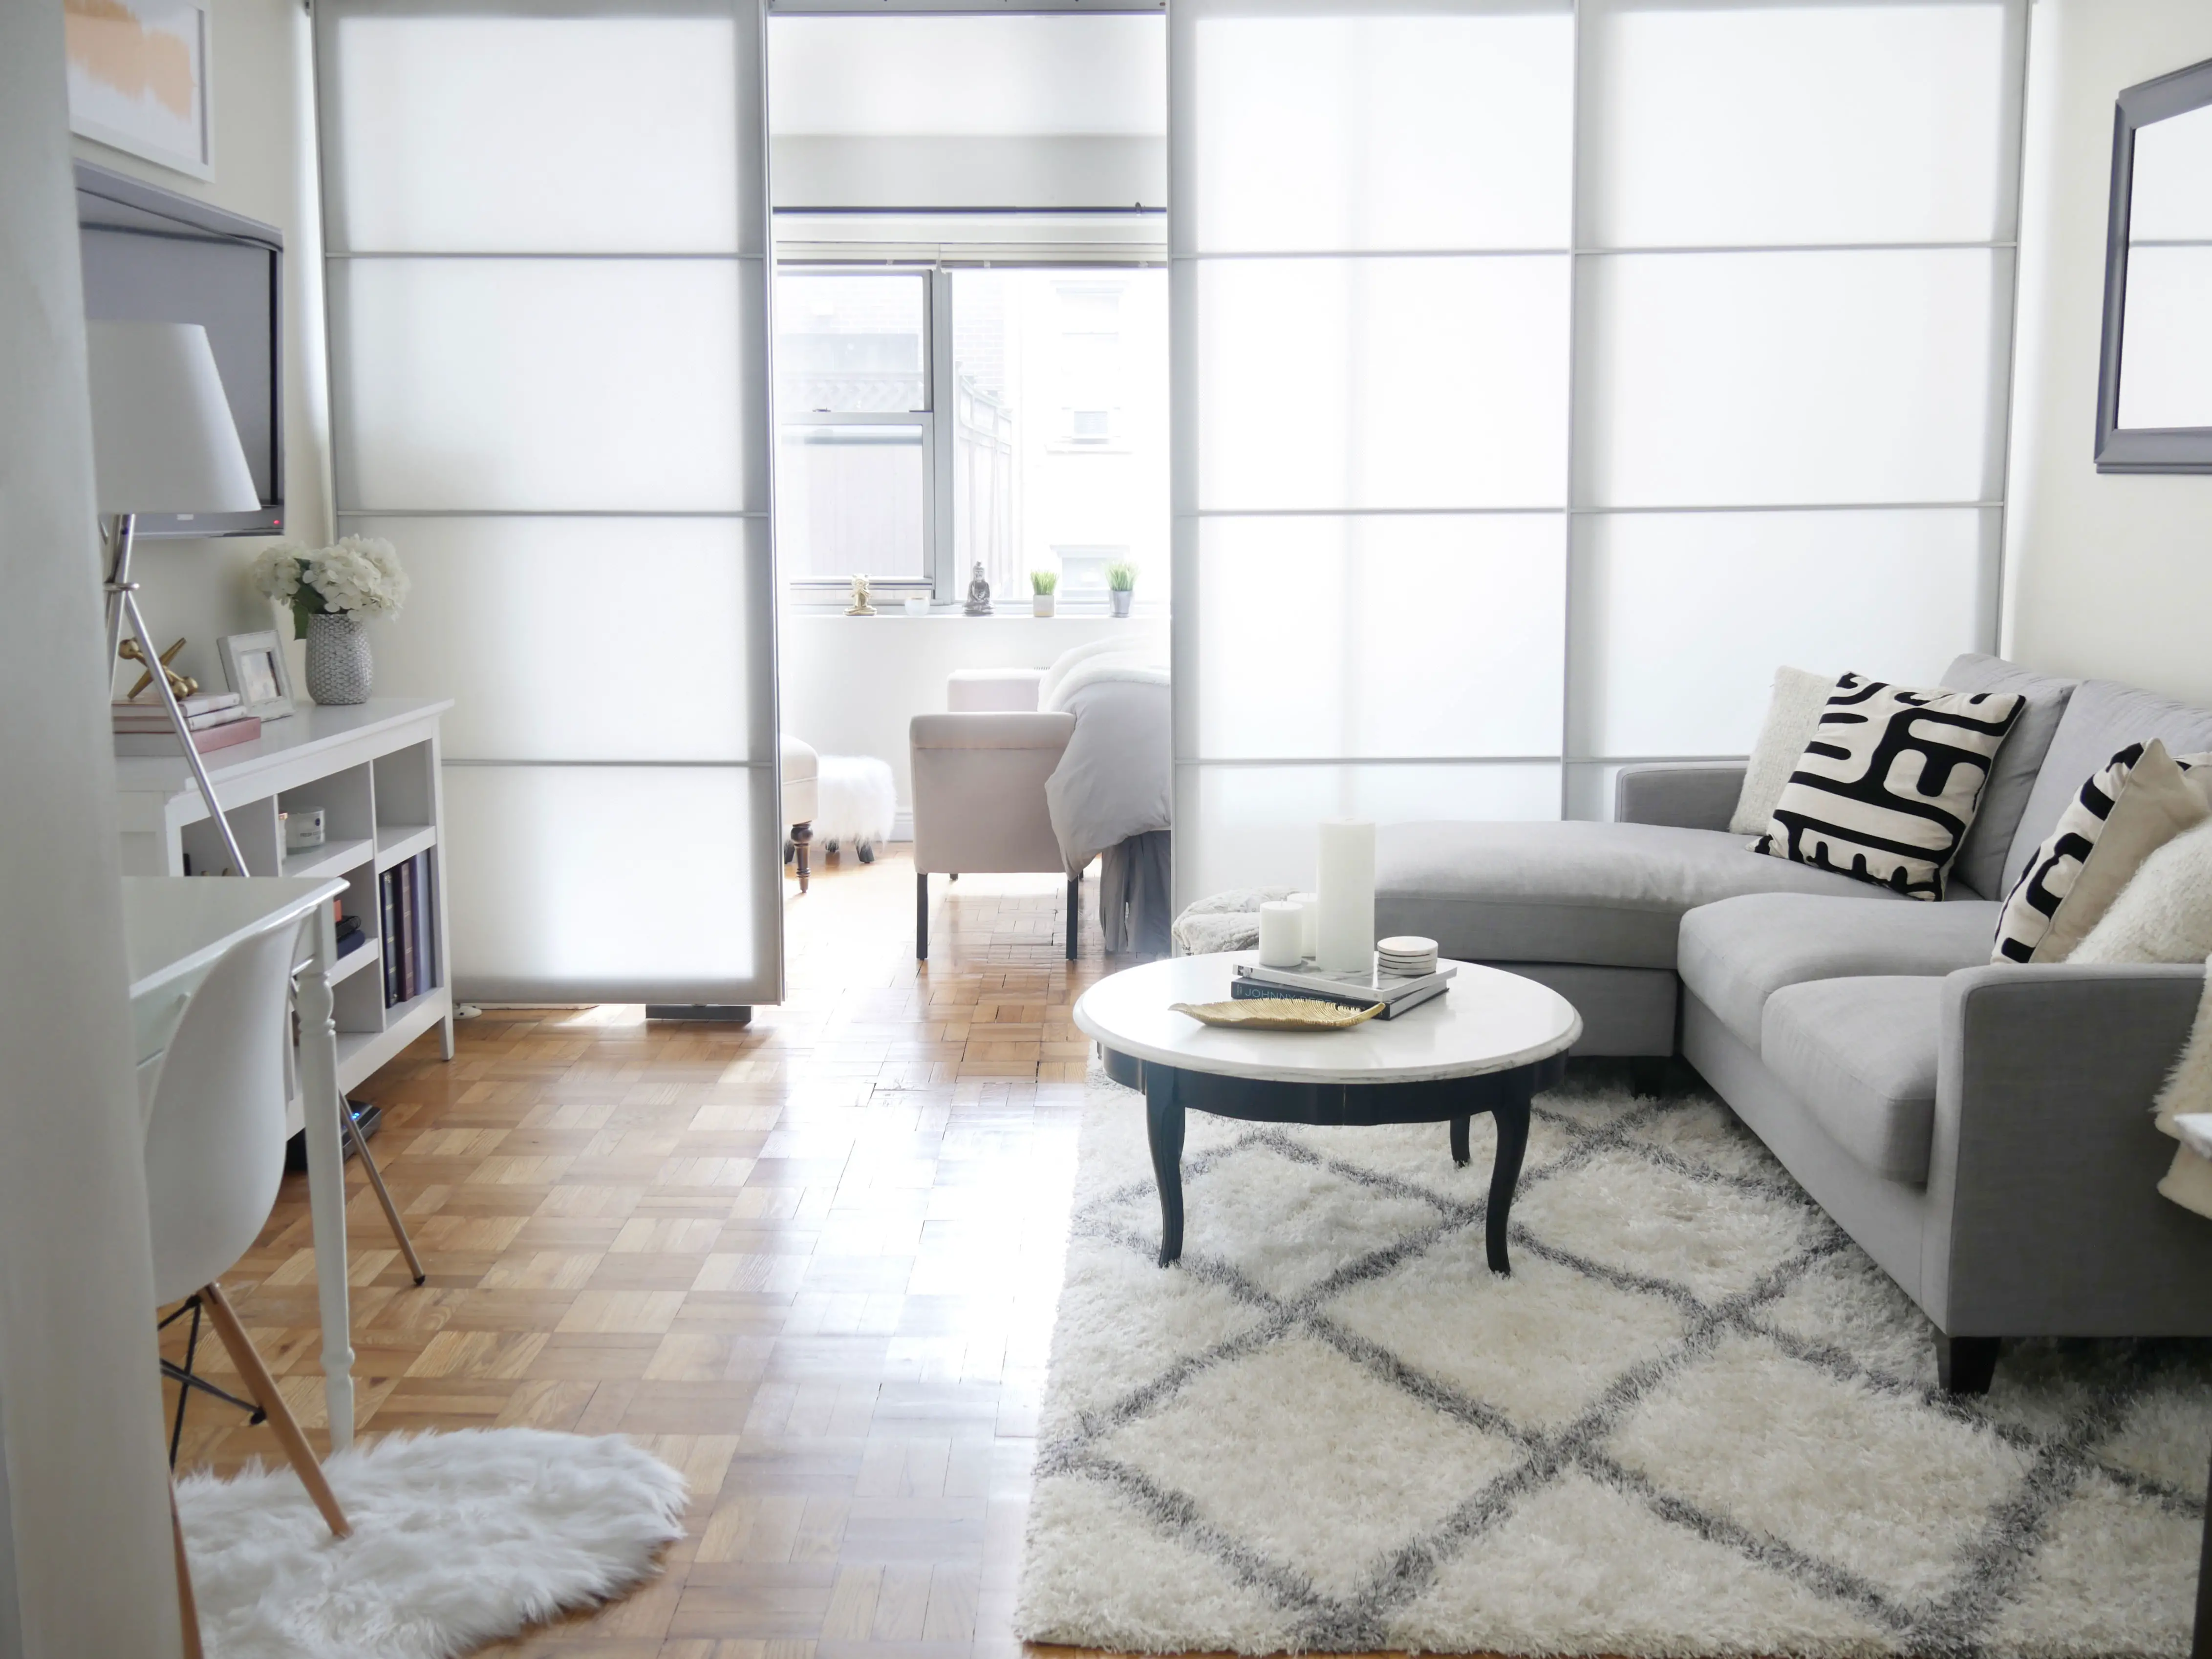


When I first moved into my apartment two years ago, my biggest challenge was adjusting to a small studio apartment after living in a one-bedroom space for over 7 years.


 My studio has only one source of natural light and I was determined to find a way to separate my bedroom while still keeping the brightness in the living room. After hours of scrolling through Pinterest for ideas, I came across a way to turn Ikea’s wardrobe doors into sliding doors to separate a room. I sent the post to my dad and he immediately starting brainstorming ideas on how to create a “faux” wall for my studio. Check out the step-by-step instructions below on how to do it:
1. First, we measured how much space I would need for my bedroom and taped off the area.
2.Next, we drilled (4) Stolmen pressurized posts to the floor and placed 2″ x 4″ blocks above each post and pressurized them to the ceiling. 3. We then attached a large piece of wood (8 foot 2″ x 4″) to the rail and the rail to the pressurized posts. Using the pressurized posts, we then compressed the rail to the ceiling.
4. After, we put together the (4) sliding door frames.
5. Once the (4) frames were put together, we then had to insert the glass panels. Originally we decided to use Ikea’s frosted glass panels but realized they would make each door so heavy that my ceiling wouldn’t be able to hold the weight of the doors. We decided to use ceiling light panels instead which would give the doors the same look as the frosted glass panels but at a fraction of the weight.
6. Before inserting the ceiling light panels to the frames we had to cut each panel down to the correct size. We used one of the frosted glass panels as our template to make sure we were cutting the ceiling light panels at the right size.
 7. Using a heat knife my Dad was able to cut down all 16 panels to the correct size then we inserted them into the door frames
8. We then attached each frame to the rails.
9. Lastly, we added two rails to the floor to secure the doors.

And there you have it! That’s how you create a faux wall for your small space. Thanks, Jackie, for sharing this amazing DIY and let us down down below if you have any questions or comments!
Xo, Jackie & Chelsey


I. Love. This. And how adorable is the photo of you and your Dad? Thanks so much for the idea!
How was drilling into the floor ok for a rental space? Was there a way to cover it up later?
Those ceiling panels look like they’re opaque on the website link. Did you order the “white” ones or did you order different transparent panels.
Love the idea and want to do the same thing in my apartment.
Thanks so much.
Love this idea! Were there any issues drilling into the floor? Did management have a problem with it?
Cool idea, but drilling holes in a rental will not let you get your deposit back. Any way to make it temporary?